
This is how you activate an SSL certificate when using Namecheap from start to finish.
This assumes that you have already purchased an SSL Certificate through Namecheap.com.
How I documented this was by updating my current SSL certificate but it works from having no SSL or updating. Let’s get into it.
Step 1: Activate the SSL Certificate

Detail directions: Go to your dashboard in Namecheap and find your new certificate. Hover over the certificate and click the “Activate” button.
Step 2: Paste in a New CSR Into the Correct Box
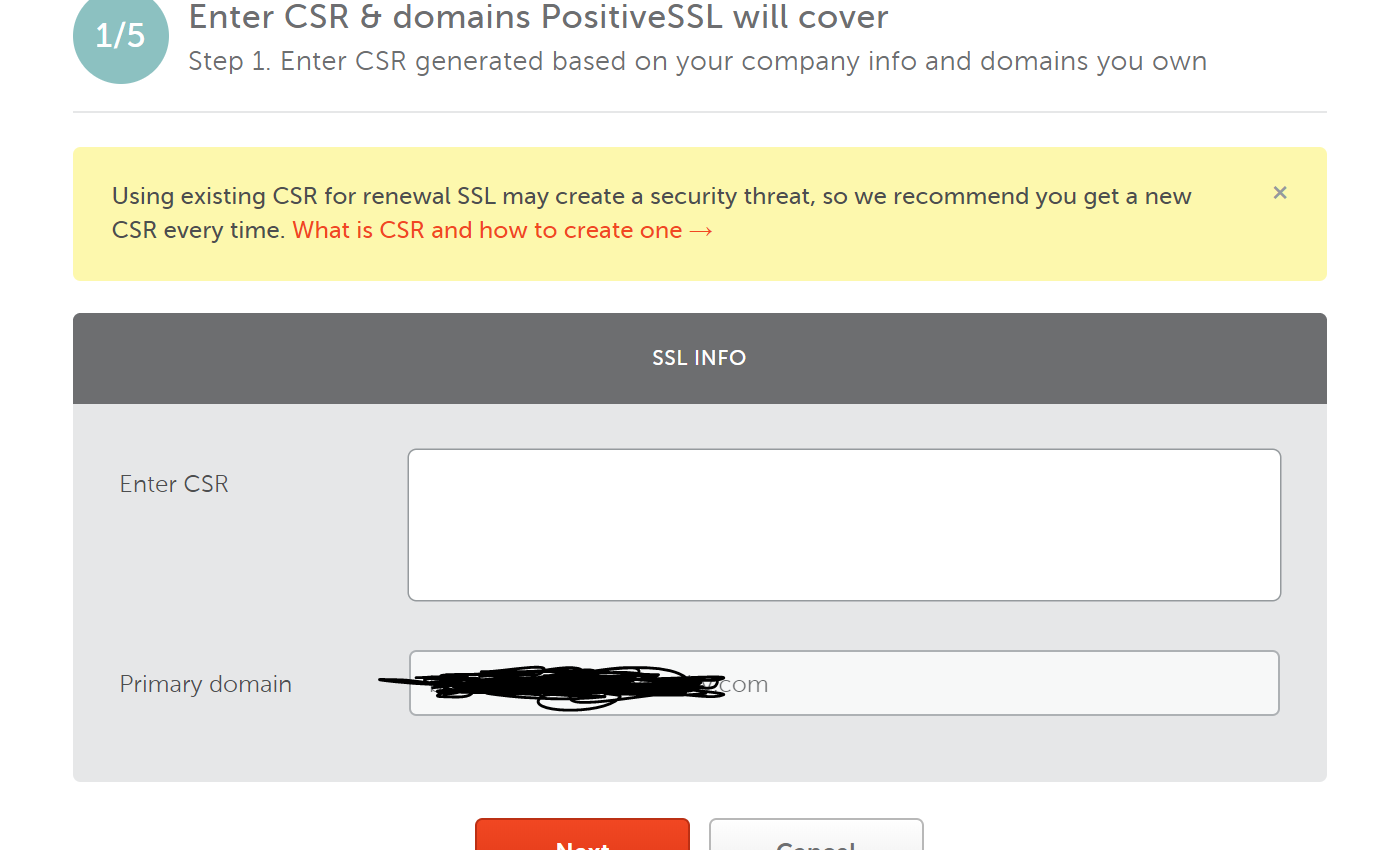
Details: After clicking activate, you will be directed to this page. It needs a new CSR. If you know how to get that from your website go to step 8. Otherwise, follow along to create one.
Step 3: Go to Your CPanel or Server Admin Panel
Details: In these directions, I use the CPanel I get through Namecheap. I go to the hosting package and click “Manage CPanel” to be directed to the CPanel for my website.
Step 4: Click the SSL/TLS Button

Details: Scroll down the list of admin actions and find the SSL/TLS button and click it.
Step 5: Go to Generate CSR Page

Details: On the SSL/TLS page click “Generate, view, or delete SSL certificate signing requests”
Step 6: Fill in Correct Information and Generate CSR
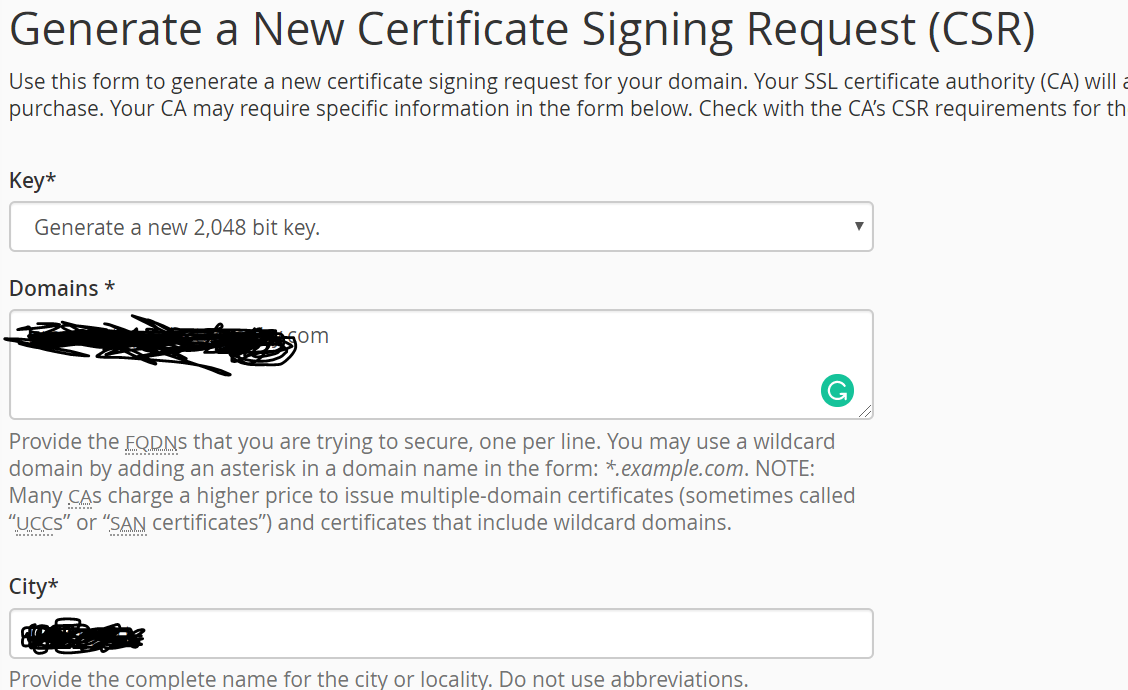
Details: On this page, make sure to fill in all the data it requests correctly. The domain is the website you are making the SSL certificate for. It would look like “example.com”. After everything has been filled in, click generate at the bottom of the page.
Step 7: Copy the Newly Created CSR
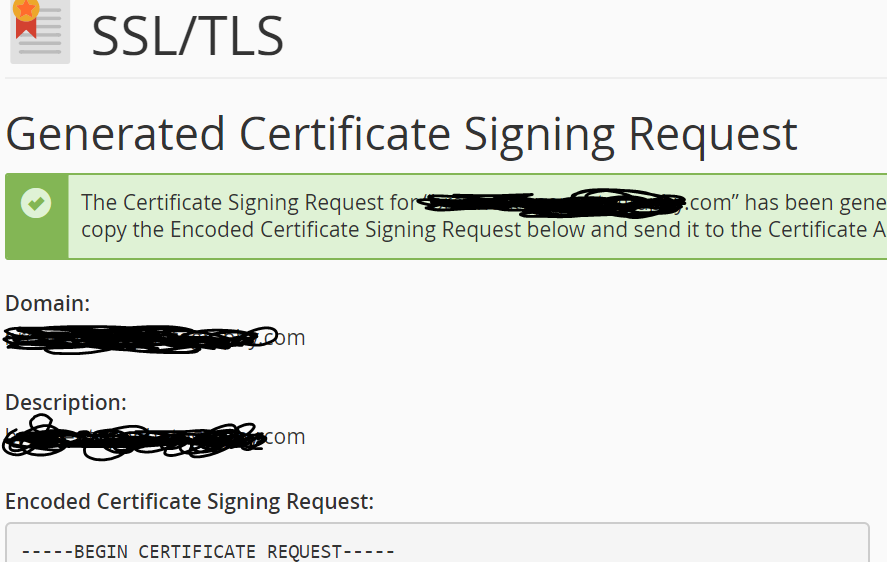
Details: If everything worked correctly, you will see a confirmation screen with the newly generated CSR. It starts at “——BEGIN CERTIFICATE REQUEST—-”. Copy everything in the box.
Step 8: Paste the New CSR Into Namecheap CSR Box

Details: Now go back to Namecheap and the page that showed “Step 1” for activating the new SSL certificate. Here, we want to paste in the new CSR we created. Then click next.
Step 9: Confirm the Correct CSR Info and Server

Details: If everything looks correct, click next.
Step 10: Choose an Email You Can Get To Associated With Your Website

Details: It will now ask to email an address associated with the website. In most cases, “[email protected]” will be available. This is the one I use.
NOTE**: If that email address has not been created, it will not work. You MUST have that email address created. This is done in the CPanel and simply find the Email action and create one for “[email protected]”
Step 11: Add Email to Send SSL Certificate

Details: Put in an email that you are able to get to. It doesn’t matter what email address it is.
Step 12: Go to your [email protected] email address
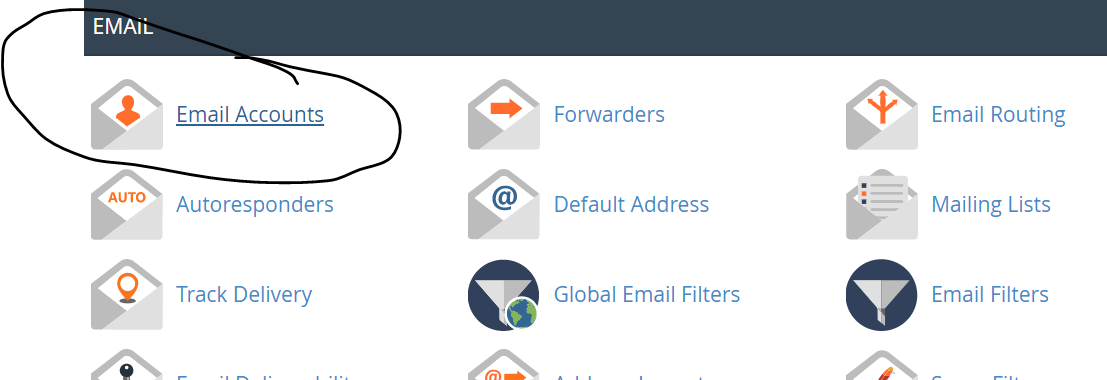
Details: How I get to my Admin email address associated with my website is going to the CPanel again. In there, click the “Email Accounts” and proceed to your list of emails.
Step 13: Check the Email for the Correct Admin Address

Details: There is a button to “Check Email” that takes you to the list of emails received for the account.
Step 14: Follow Link With the Email for SSL Certificate

Details: There is a link that will come with the correct email. Click it.
Step 15: Type in the Validation Code from Admin Email

Details: There is a validation code that came with the email; type that into the text box that asks for it on the page after clicking the link. Once that happens, it will email your SSL certificate to the 2nd email address you put in.
Step 16: Copy the SSL Certificate from Email
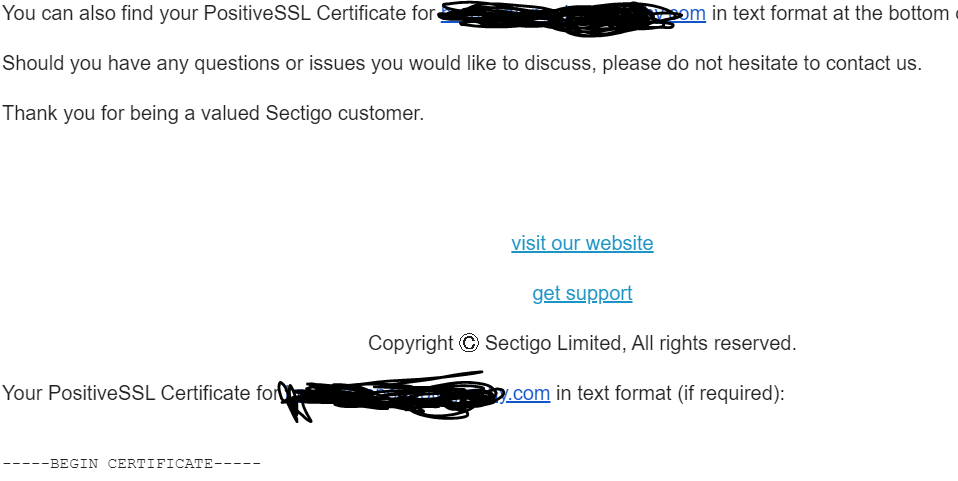
Details: Simply go to your 2nd email you typed in and find the new email about the SSL certificate. This holds all the information about it and gives it to you in a text format.
Step 17: View the Current SSL Certificate for Your Website
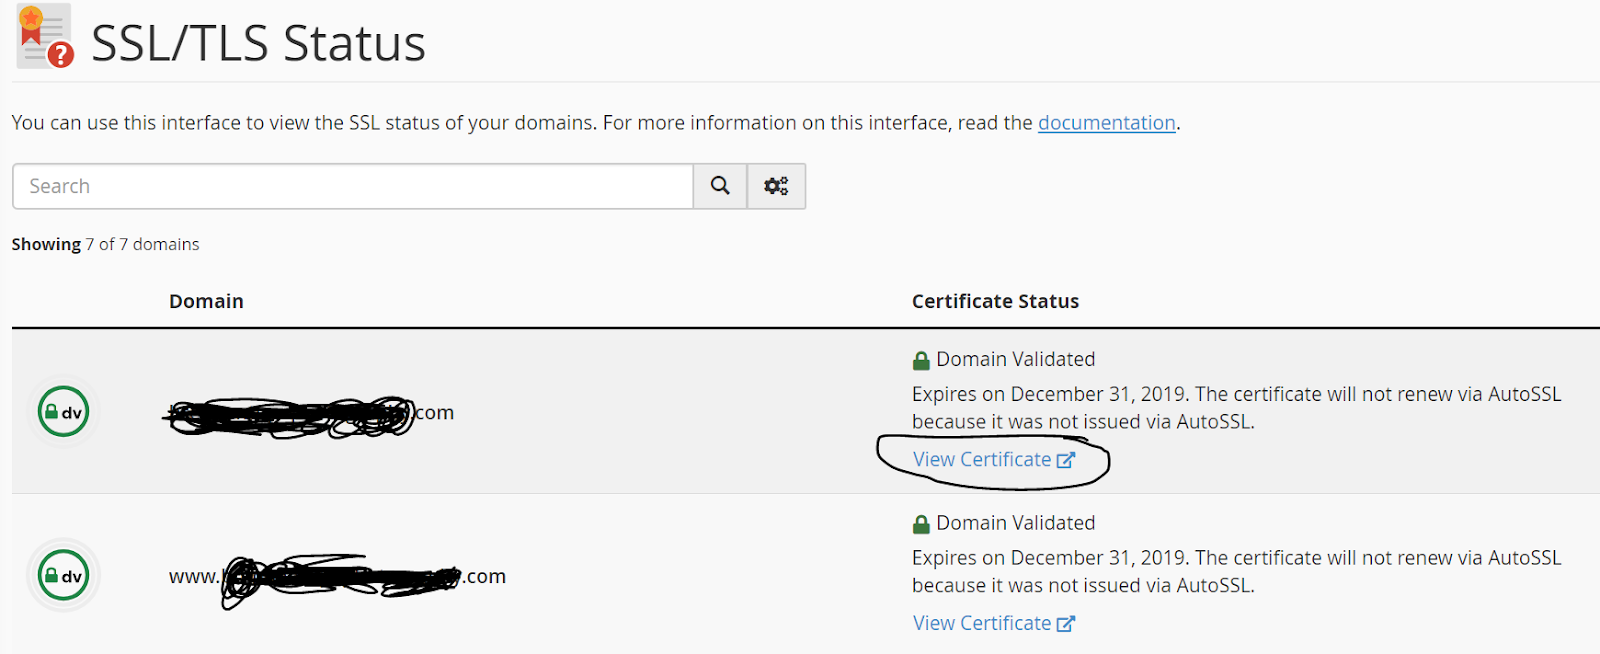
Details: Go to your CPanel and find the action labeled “SSL/TLS Status” and click it. On this page, you want to find the current certificate or you want to add a new certificate.
Step 18: Update Certificate

Details: On the next page, find the button “Update Certificate” next to the expiring certificate.
Step 19: Add in the CRT & Autofill by Certificate

Details: Paste the CRT certificate into the correct place and click the “Autofill by Certificate” button next to the box.
Finally: After autofilling the correct information for the SSL certificate, make sure to follow the correct buttons to activate it. It should now show the certificate to be activated.